
Welcome to the first edition of Designscapes World of How To… (DWHT) We will be providing you with a collaboration of weekly instructions and tutorials on numerous DIY projects you can perform in your own backyard. These activities are great for family bonding, team building or just as a hobby. Hopefully we can provide you with valuable information you can utilize and pass on to others.
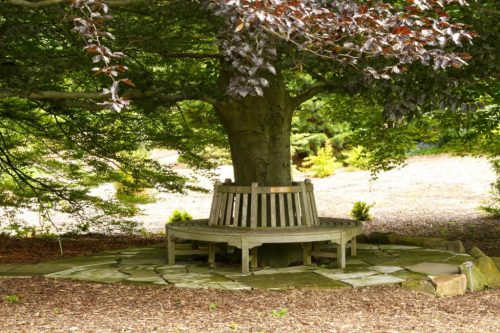
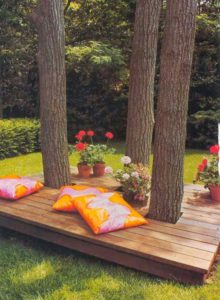
This week we will provide step by step instructions on how to build your own “Tree Bench.” If you love to be outdoors and enjoy building things with your hands this is tutorial for you! You can follow the design to exact or choose to add your own twist to encapsulate your own unique character. Let’s start by listings the tools and materials needed to get this done and lounge at leisure!!
Materials
- Cedar Decking – use online calculator to appropriate the proper sizes dependent of your tree dimensions. An alternative is to build a six section template to size out the proper bench radius.
- 2 inch decking screws
Tools
- Shovel
- Chop Saw
- Hand Sanding Block
- Circular Saw Or Reciprocating Saw
- Large Square
- Leveler
- Drill With Screw Drive And Pilot/Counter Bore Bits
- Angle Square
Steps 1 – Cut the Six Inner Seat Board and Inside Row
Plan the dimension of the hexagon custom tree bench to encompass the tree truck without damaging it or impeding growth. Size the seat boards by using a template to cut inner seat to size from decking. Lay three boards parallel to it, using a ¼” spacing, lay two pieces of scrap lumber atop the boards, following the angle cuts (30-degree) on the inner seat board. Trace cut lines onto the uncut boards.
Step 2 – Cut Boards to Size
On both ends ensure you extend a 30 degree cutline from the board across the other two. Cut sets of inner, middle and outer planks in this manner. Use your template as a guide to measure and cut five more boards at each size to make seating for the bench’s six section.
Step 3 – Lay Out and Attachments
Arrange seat boards in a hexagon shape on a flat surface using your ¼” spaces between them. Begin with inner seats boards align and adjust the joints between them. Drill pilot holes beneath to screw a support directly over the joint and one at both ends of the assembly. Secure them with galvanized carriage bolts, washers and nuts; tighten bolts with a socket wrench compressing the wood. Make two assemblies reserving the remaining two individual sections for installation after being positioned around the tree.
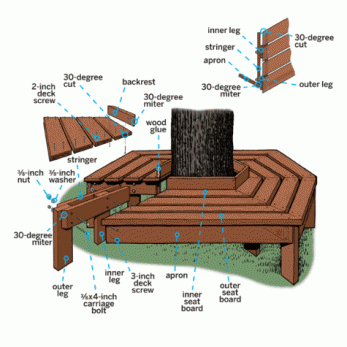
Step 4 – Leg Assembly
Leg assembly consists of outer and inner legs sandwiches between two stringers. Cut 12 legs from 2×6 framing to height of bench, minus the thickness of the seat boards. Measure distance from the midpoint of an inner seat board at its cut end to the long point of the outer seat board. Subtract 3 inches to leave room for the reveal and apron. Cut 12 stringer from decking to this length. Cut a 30-degree miter off the front end of each stringer, where the apron will be attached.
Step 5 – Placing the Bench
Turn the two bench assemblies upright and drill countersink pilot holes and screw through the bench top into the support cross braces below. The countersunk screw heads will lie beneath the surface and protect clothing. Begin the leg assemble by positioning on a flat surface, using clamps to keep them from tipping over. Lay the seat boards with ¼ spaces between them, on the top of the leg assemblies. The joints between the boards should be centered over the legs; ensure the front edge of the benches creates a ½ inch reveal beyond each leg assembly. Join two sets of two jointed section attaching the outer three seat boards on two adjacent section to the three leg assemblies by drilling 3/32 inch pilot screws in the pilot holes; repeat for the two adjacent section that are opposite the ones fastened together. Level the two bench assemblies around the tree placing the remaining seat boards between them on top of the exposed halves of the leg assemblies. Use a garden spade to remove soil beneath the legs until seat is flat.
Final Step 6 – Creating the Backrest
Set the edge of the framing board flush with the back edge of the inner seat board. Cut ends of seat board onto the back rest bottom edge and bevel the ends of the backrest following a 30-degree angle. Glue backrest to the back edge of the seat board. Lift the pieces from the bench and clamp them together, drill a 3/32 inch pilot through the underside of the seat boards and into back rest. Drive 3 inch deck screw through the holes, set assembly in place and repeat for adjacent seat boards and back rest. Glue together the mitered edges and drill pilot holes diagonally through the joint at the top and bottom. Drive a 2 inch deck screw through each hole. Repeat until entire backrest is fastened. Screw inner boards to the stringers. Finally, measure the distance between the long points of the stringers for each section. Cut the boards from framing to this length, beveling the ends with 30-degree miters. Drill pilot holes and attach it to the outer legs with 3 inch deck screws. Drive a few more spaced screws throughout the outer seat board and into edges of the apron.
Optional
Coat raw wood with sealer to extend the life of the tree bench, keep it looking good and prevent the top from weathering. This will lead to less maintenance, improves the appearance and preserves the quality of the wood. If you just want a different look, run a string of lights around the circumference of the structure or add LED lighting at key locations to accent your work.
That was a lot but if you follow step by step it will be much easier than you think. If you need some assistance we would be more than willing help, just contact our Designscapes Team.
Come back and join us on Thursday 11/17/16 for more DWTH instructions on how to create and utilize water conservative rain barrels for your residence.
For the professional builder who likes to do extracurricular projects, glace below to see how you can start simple and take off on design ideas that will make you the envy of your community.
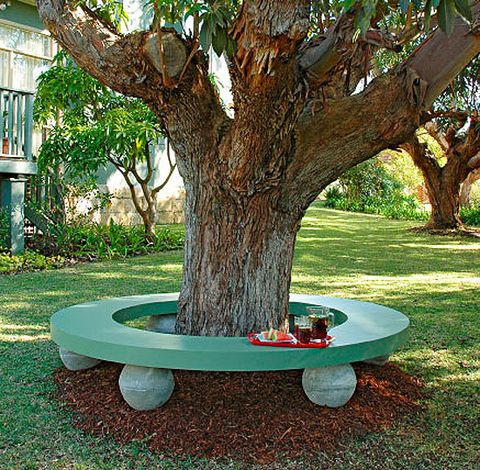
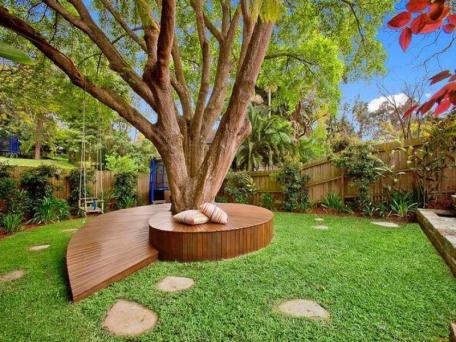
Courtesy of Garden Ideas