


Designscapes World of How To (DWTH)…Vol. V – Outdoor Stone Fireplace

Welcome to the fifth edition of Designscapes World of How To… (DWHT) We will be providing you with a collaboration of weekly instructions and tutorials on numerous DIY projects you can perform at home or in your own backyard. These activities are great for family bonding, team building or just as a hobby. Hopefully we can provide you with valuable information you can utilize and pass on to others.
Winter is here and it is time to indulge in its seasonal activates. What is more pleasing then sitting by a roaring fire, roasting marshmallows and savoring valuable family time all while continuously adding monetary worth added to your home’s value.
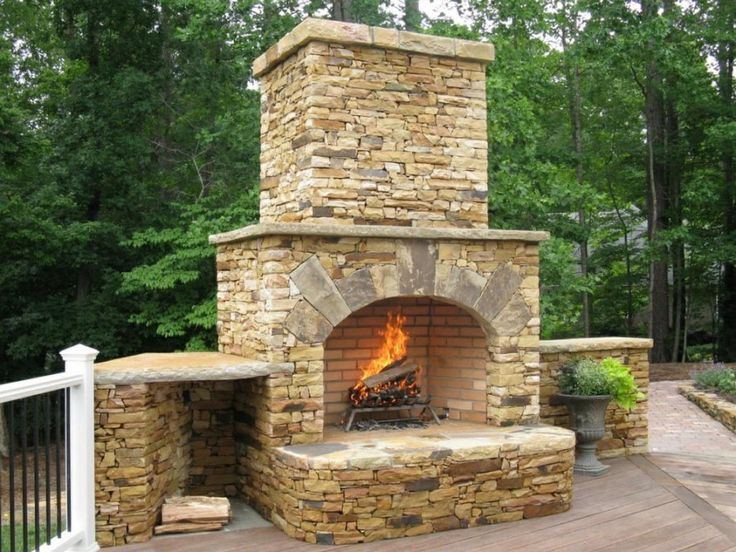
This edition of Designscapes How To will bring the indoors outside. We will learn how to build an “Outdoor Stone Fireplace.” Follow theses 8 simple steps below to create your outdoor oasis.
First you must create the design you wish to build. Use tape measure to determine width, length, depth and height of fireplace. Choice your desired stone and capstone to be laid. This tutorial that we will go through is for wood burning fireplaces only. If you choice to build a gas lit unit place contact a professional.
Tools
- Jointer
- Level
- Rake
Materials
- Landscape fabric
- Mortar
- Spray paint
- String
- Stone
Step One
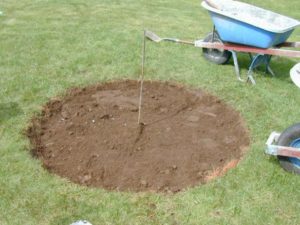
Prepare the Base
Find a safe spot and provide a layout for the pit. If you need to dig a small ditch for placement always contact your local public service agency to request locates before you dig.
Prepare the base and hammer a piece of rebar in the center to the fire pit locations. Cut a piece of trim to half the length of the fire place diameter. Make a loop on one end of the string and slip it around the rebar; loop other end around a can of landscape paint.
Step Two
Mark the Footings
Cut a second piece of string the length of the first piece minus the thickness of the fire pit wall. For example, if the wall is going to be 12 inches wide, cut the string to a length of 1-1/2 feet. Attach the string to the rebar and spray paint and mark a second circle inside the first.
Step Three
Pour Footings
Prepare premixed cement according to manufacturer’s directions. Spread the cement in the area between the outside and inside circles. Leave the center area free of concrete to allow for drainage.
Continue to add cement and level it until it reaches 1-1/2 inches below grade. Tap 2-foot pieces of rebar into the wet cement until completely submerged at various points around the footer. Allow to dry.
Step Four
Lay the First Course of Fire Bricks
When the first course of face stones is in place, move on to the first row of fire brick. Trowel a layer of mortar along the inside edge of the face stones and press the first fire brick into place.
Apply mortar to one end of the next brick before butting it against the first and pressing it into the mortar. Check for level. Remove excess mortar as you work. Continue working in this fashion until the first ring of fire brick has been laid.
Step Five
Complete the Fire Pit Wall
Continue building the wall of the fire pit by alternating layers of face stone and fire brick until desired height is reached. Apply a bed of mortar on top of the previous layer of stone or fire brick and then set stones and bricks.
Avoid wall weakness by staggering the joints between previous and subsequent layers of stone and brick. Fill in any gaps between the fire brick and the stone with mortar and stone scraps.
Step Six
Lay Capstones
Apply a generous layer of mortar to the top of the fire pit wall, covering both the face stone and fire brick. Begin setting capstones into the mortar, selecting flat stones that fit neatly together.
Work all the way around the top of the fire pit wall making sure that all stones are as level as possible. Fill joints between capstones with mortar, smoothing when done with a jointer. Once the mortar is almost cured, use a stiff brush to scrape off remaining bits of mortar.
Step Seven
Create Seating Area
Cut a piece of string that extends from the center of the fire pit to the outside edge of the desired seating area. Attach the string to the rebar and spray paint and mark the location on the ground. Excavate the seating area to a depth of 3 inches. Cut landscape fabric to fit and top with crushed stone.
Step Eight
Spray down the fire pit with water to remove any dust or dirt that might have collected on the stone. When dry, spray the interior of fire brick with black stove paint.
Make sure and check your local state regulations and statues to ensure your jurisdictions approves their use and what are the limitations as it pertains to your property.
Just that easy! Now see how this can be taken to another level! Check out some creative stone fireplace designs that might get you motivated.
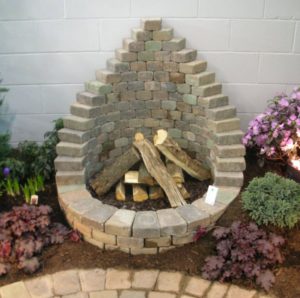
If you would like us to create you a design or install a gas-lit fireplace unit feel free to contact our Designscapes Team.